
How to connect the socket from the switch. How to make a socket from the switch
- Switch
- Socket
- Effects
- Instead of a switch
- From the double switch
- Is it possible to make a socket from the switch?
- In what cases may need such action?
- What tools do we need?
- Installation of the outlet in the case of a single switch
- How to install a wall outlet
- How to pull the switch from the switch
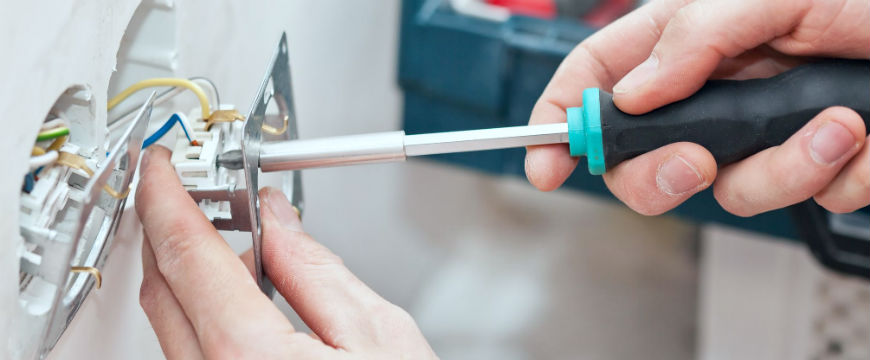
- Step 1. Preparing the switch for wire connection
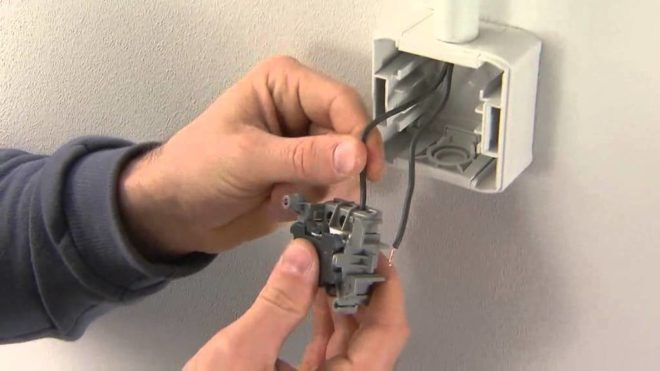
- Step 2. Removing the switch box from the socket
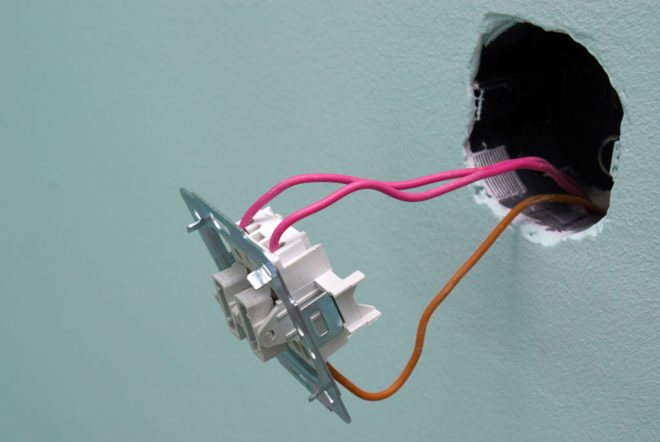
- Step 3. The location of the socket outlet
- Step 4. Device Mounting Process
The vital activity of a person in a house or apartment is certainly connected with household appliances. electrical network . Sometimes there are such situations when it is necessary to transfer the elements of electrical wiring (light switch or socket) to another, more convenient place. This publication will discuss how to make the socket from the switch, and is it possible to carry out such work not in theory, but in practice?
In order to understand this question, we consider the design and purpose of switching devices.
Switch
The switch consists of two contact groups (input and output). His main task is to close or open the already finished electrical circuit to supply voltage to the lighting device. Remember, this switching device always works only on phase break, it does not need zero. Only phase wires should be connected to the switch: one from the mains (to the incoming contact), the second from the luminaire (to the outgoing contact).
Socket
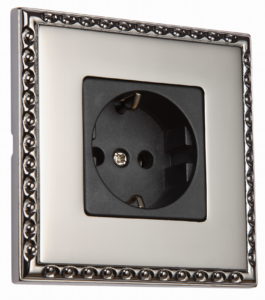
The main function of this device is to supply voltage to consumers (power tools, household appliances). From the household appliance the cord with the plug is inserted into the outlet, the voltage is applied to it and the equipment starts to work. To connect the outlet necessarily need a phase and zero. If the case of conductive technology, you will need more protective grounding.
Effects
In the slightest degree it will become clear to a person who understands electrical engineering that it is impossible to remove an outlet from a switch without changing the electrical installation of these switching devices. Any household appliances will fully work only on two potentials - phase and zero. And in the switches there is only a phase, they can not provide a supply of zero to the outlet.
A parallel wiring diagram of the outlet and the switch will give us as a result such a picture. Every time you turn on the household appliance, the current will flow through the light and the light will come on. Such a scheme is undesirable for the following reasons:
- At the same time, two consumers will work (a lamp and a household appliance), this may lead to overheating of the wires. And you know that any additional heating of the electrical network is already a reason for an emergency.
- Powerful devices (more than 500 watts) cannot be connected according to this scheme, since an increased current will flow through the lamp in the luminaire, which will cause it to exit from work (it will burn).
- At the time of connecting consumers to the network voltage is possible landing. In this case, other household appliances, such as a refrigerator, may turn off.
Let's try to figure out what are the ways out of this situation.
Instead of a switch
This option involves installing an outlet instead of an existing switch. This is done when absolutely necessary. Note that this will not completely cover the room. This option can be used as a temporary. For example, you make repairs in a non-residential premises and you need to periodically connect power tools. If the work is done exclusively in the daytime, when there is enough natural light, you can connect the outlet instead of the current switch.
To do this, you will need to perform the following switching actions:
- De-energize the room (turn off the machine), in which you will work, and check the absence of voltage.
- Dismantle the switch from the power outlet and disconnect the wires that fit it.
- Install the socket in the socket and now it is necessary to connect the wires from the switch to its terminals.
- The next stage of work will be in the junction box where all the electrical wiring of this room has been made. Connect one wire from the newly installed outlet to the phase core of the power supply network, the second one must be connected to the zero core of the power supply network. Two wires that are from junction box went to the lamp, it is necessary to disconnect and insulate.
- After all the above works have been completed, energize the room from the power source (turn on the machine) and check that the outlet is powered properly. To do this, include in it some kind of household appliance, it should function normally.
From the double switch
If the room has a two-button switch, you can not remove it and power the outlet. Only after such switching the switch will already work in one-key mode.
What is this way?
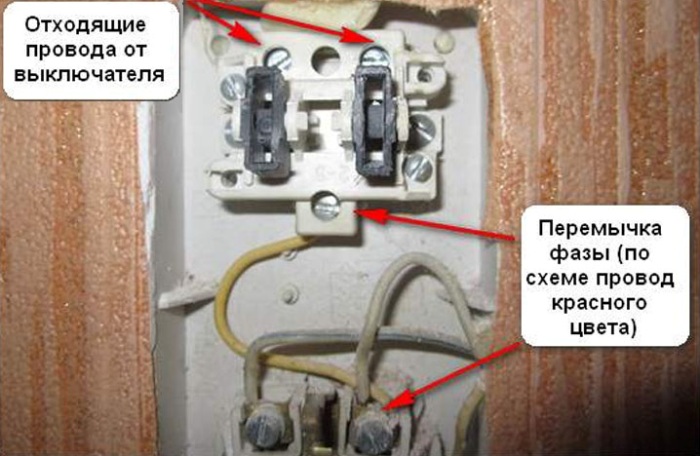
The three-core wire brought to the switch was distributed over its terminals as follows:
- one lived on the input contact;
- two conductors on the outgoing contacts.
After switching, the two conductors will continue to work according to their purpose (input and one output), and the third core will be powered by a zero outlet.
The algorithm of these reconnections will be as follows:
- De-energize workplace (disable input automat).
- Pull the two-button switch out of the bottom panel.
- Before connecting the socket, make a gate for it from the place where the switch is mounted, and also prepare a hole for the installation.
- Between the two holes, lay a two-core wire in the gate.
- Connect two wires respectively to the phase and zero contact of the socket.
- The following steps will be in the junction box. It is necessary to disconnect the zero conductor from one of the lighting fixtures from the neutral wire of the power supply network, insulate it, and instead connect the third conductor of the switch, from which zero sockets will now be powered.
- It remains to produce switching in the switch box. The phase from the outlet is connected to the incoming contact, and zero to the output for that lamp, which will now not be involved.
Now check the operation of the entire circuit. Power up the room by turning on the input automat. Press the switch key, which remains working for lighting, the lamp should light up. Insert the power plug in a household appliance, it should work. And be sure to remember, never touch the second key, because if you press it, you close the zero and the phase, and this is a short circuit.
Important to remember! Such switching is a temporary, for some reason, necessary option. Try to switch to a normal electrical circuit as soon as possible.
We reviewed possible options how you can try to make the socket from the switch. Consider that such work should be undertaken by a person with certain experience in the field of electrical engineering. Before doing the work, think a hundred times whether you need it? Could it be better for each switching device to work independently?
In the old apartments, which are still actively sold, the wiring was carried out for a long time. And often we are unable to carry out full-fledged work on its new laying. However, sometimes it becomes necessary to create additional space for powering electrical appliances. And questions about whether it is possible to connect a switch to the outlet are often asked. Today we will try to answer these questions.
It does not matter whether you are going to work with a power outlet or with a light switch, remember that it is about electricity. Therefore, it is necessary to work with it, observing all safety rules, as well as having special equipment. If you are not confident in your abilities, then the process is best to be entrusted to professionals.
Important! All wiring work should be carried out only in the conditions of disconnected electricity. As a rule, at the entrance or even in the apartment there is an automatic machine, where it can be done either for one room or for the whole apartment.
Is it possible to make a socket from the switch?
It should be noted that this article will discuss how to hold the outlet from the switch. That is - we divert wiring from this element, which in turn will end with a socket. There is another option to make the socket directly in the socket from the switch, but this approach usually does not bring satisfactory results due to the fact that this outlet is too high and not in the best place.
In what cases may need such action?
- Sometimes additional consumers of electricity appear in the room, and we are forced to find a way to feed them. In this case, use already existing sockets loaded with electrical appliances, we can not;
- The room broke one or more outlets. Sometimes the failed connection point was the only one, and in this case, one of the outputs would be to create an outlet from the switch.
Important! Conducting an outlet from the switch, although the procedure permitted by the rules, is still a temporary solution to the problem. Subsequently, this wiring should be reduced to the original distribution.
What tools do we need?
The list of tools is not very large: an indicator screwdriver, a socket (for more information on purchases, read below), pliers (the presence of a rubber handle is extremely important), as well as a suitable wire for this. At the same time, for safety reasons, it is better to purchase rubberized gloves. Well, if the work is carried out without switching off the current (which should be avoided in every way), then a rubber mat under the legs will also become a crucial factor.

Installation of the outlet in the case of a single switch
- It is necessary to remove the keyboard and the cover from the switch, exposing the metal frame and the switching mechanism;
- After that, unscrew the bolts that hold the switch, and pull it out;
- We are planning a place to install the future outlet, making it no lower than half a meter from the floor, as well as at least one and a half meters from radiators and other appliances for heating the room. Stay away from the water and gas communications. The length of the wire, which we will conduct between two points, is determined accordingly.
- A subconnector is installed, after which, in accordance with the instructions, the socket is mounted and wires are connected to it. Instructions for installing the outlet will be given by us at the end of the material;
- Next, we need to visit the junction box, which is available in any apartment, and in which the entire wiring is switched. In the box and carry out switching in such a way that a zero (N) and two phases (L) are fed to a new outlet. The same wires that previously went to the light bulb, we will isolate.
Wiring socket from a double switch
If in the first case we received a fully functional outlet, but at the same time, in fact, we lost the lighting in the room, then in the case of a paired switch, everything happens differently. After all, this way we can equip an extra outlet, while maintaining the lighting in the room.
The main task in this operation is to redistribute the purpose of one of the three wires, which is supplied to the switch. We will do this, as in the upper case, using the junction box. The task is to assign the role of the neutral conductor to this third wire. In total, the task is divided into several stages:
- De-energizing the network, dismantling double switch , preparing the place for the outlet and its installation;
- Go to the junction box and reconnect one of the outgoing wires from the switch side to the common zero conductor. The corresponding wire that goes directly to the lighting device is disconnected and isolated from the common network;
- In the course of work with the socket, we connect one core with the created cool wire, and the second one with the phase wire, which is laid to the switch;
- After installing the double switch, the conductors are connected to the terminals. The device continues to perform its function, but in this case it turns into a single switch.
How to install a wall outlet
We purchase the appropriate materials: a socket (you should not save on quality, it is preferable to use a ceramic base), a cable, a box for a socket and alabaster. The latter, you guessed it, is necessary for secure fixing of the box itself in the wall. We will discuss this below. The process itself consists of the following tasks:
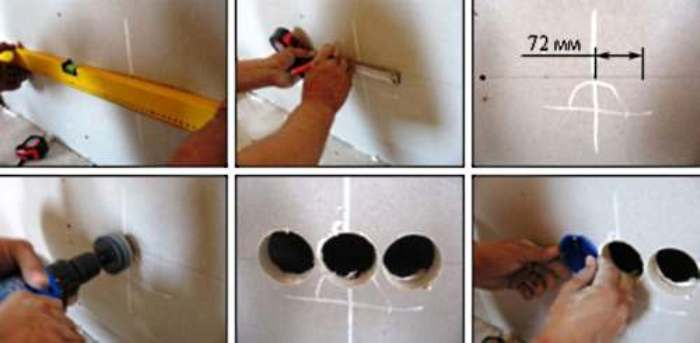
- Marks a place on the wall according to the instructions sounded above. At the same time, work on the concrete chroming is usually performed by a chisel or perforator. The same applies to the creation of a channel from the outlet to the junction box. Before this, it is necessary to use an indicator screwdriver, which will help us make sure that there is no longer any wiring in the place of work;
Important! When working with power tools, which happens almost constantly, you will need to attend to power issues. Most often in this case, turn off the electricity only in one room, and from the second pull extension cord. In the absence of the opportunity to do this, you will have to take the help of your neighbors
- Preparing to install the box under the outlet. At this stage, we need to pre-drill or pull out of the box a piece of plastic through which the cable will pass in the future. In parallel, we breed alabaster, diluting it according to the instructions. Since this method of plaster seizes very quickly, it is not recommended to dilute a large amount at once;
- Installation box. Place the alabaster in the hole in the wall, and then drown the box in it, ensuring that it is level and that its ends are flush with the plane of the wall;
- Cabling. Before this, the apartment is de-energized completely. The prepared cable is placed at one end into the duct, and the other into the place where the wires are switched, while partially fixing itself with an alabaster solution in the crushed channel. Try to take in excess, so as not to detect the fact of insufficient length in the case of excessive cable consumption. After that, the wall can be finished completely;
- Switching It is necessary to remove approximately 7 centimeters of insulation, after which the zero, phase and ground are mounted to the power points of the conductors. It is possible to switch both with the help of special terminals and the twisting method with subsequent insulation;
- Installation of the outlet. We remove the decorative part from the pre-prepared socket and place it in the box, connecting all three wires to the corresponding parts, placed with letters PE, N, L. give tension and check the quality of work.
Before you begin the presentation of the main part of the article, it is necessary to answer two fundamental questions on this topic: “Can I make a socket from a switch?”, And “Can I make a socket from a switch?”. The answer to the first question is “yes.” By manipulations, which will be further described in the course of the article, the wiring can be removed from the switch and connected to the wall outlet. The answer to the second question is “No”. It is impossible to change the switch into the socket, because they have different specifics of work.
How to pull the switch from the switch
Before proceeding with the installation of the outlet from the switch, it is worth recalling that the manipulation of the wiring in the living room can only be carried out with completely disconnected electricity throughout the apartment.
For this type of work, you will need the following tools and materials:
- pliers with rubber handle;
- rubber gloves;
- indicator screwdriver;
- rubber bedding under your feet (if you work at your own risk and risk under stress);
- wire of the necessary section and configuration;
- socket.
Step 1. Preparing the switch for wire connection
The keyboard and protection pad are removed from the switch. Further, in order to ensure the convenience of future work, it is necessary to leave 60 mm of the wire that comes out of the switch.
Step 2. Removing the switch box from the socket
To do this, it is necessary to unscrew the screws that hold the clamps of the plates, and carefully pull the switch body out of the socket.
Step 3. The location of the socket outlet
It is necessary to choose a place for the outlet itself. Its height above the floor should be at least one meter. Also the nest of its body should be at a distance of at least one and a half meters from any heating appliances and systems.
Step 4. Device Mounting Process
First, a wall plate is installed on the wall. Then its contacts are exposed and connected to the contacts of the disassembled switch using a previously prepared wire. Podrozetnik closes with bolts, and the case of the outlet itself is screwed to it. The resulting wiring is attached to the wall at a height of at least 30 cm from the floor. Our outlet is ready.
When using such a construction in a house, it is worth remembering that the light in the room will turn on every time the appliance connected to the outlet turns on.
In what cases may need such action?What tools do we need?
This publication will discuss how to make the socket from the switch, and is it possible to carry out such work not in theory, but in practice?
What is this way?
Before doing the work, think a hundred times whether you need it?
Could it be better for each switching device to work independently?
Is it possible to make a socket from the switch?
In what cases may need such action?
What tools do we need?
Before you begin the presentation of the main part of the article, it is necessary to answer two fundamental questions on this topic: “Can I make a socket from a switch?